


How to Cut a Modern Mullet
Check out this how to for the lowdown on cutting a mullet with a modern twist. Maybe your scared of turning your guest pure 80s with their haircuts and want to see more mullet creativity. We have a special guest Ryan Henney here to showcase some modern mullet cutting skills and techniques. He has an interesting method to hair cutting and we think this mullet hair cut will rock your socks off.
This video is a live session, taken form out YouTube channel Free Salon Education. Check out the link to take you to our video gallery! Were also lucky to be sponsored by Minerva Beauty, check it out for some serious salon interior goals. All that aside, take a look at the video below for some magnificent mullet hair cutting education. If you don’t have time for the full video, keep reading the step-by-step guide to modern mullet hair cutting. Check out @henneycuts for more of his work!
Starting point of cutting a mullet
Ryan likes to point out that he prefers to start looking at the crown area and how it falls. That little whirl of a growth pattern determines how your hair wants to sit. This is smart to take into consideration with a mullet hair cut and can determine how the hair lays, so keep it as a reference point on how the hair will fall.
Section the hair
The sectioning technique of this modern mullet hair cut is very simplistic. Ryan identifies that each head will be different and that you need to alter the sectioning based on the guests needs. He takes a basic horse shoe section that starts at the crown and finishes at the recession points on the head.

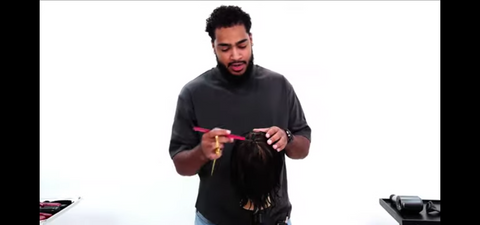
Start some mullet cutting
Ryan Shows us how he cuts his mullet guide line to determine the length of the bottom section. He follows the section line and horizontally cuts in his line. On the Back left he wants a longer guide than the back right, you will see why later. The guides meet in the middle back. The guide cut in front of the ear is tapered out shorter and closer to the head, again you'll see why if you keep on reading.

Cutting the top of the mullet
Once his guide for the lower portion of the haircut is in, Ryan works on the top of the mullet. He splits the top horseshoe section and lets it overhang his guide. The hair is combed out, and follows the way the hair falls in a middle part, combing flat and following his previous cut guide at the back. The area in front of the ears Ryan is mindful of the shape, taking it a little below his guide and creating a squarer shape. He repeats the same steps on both sides.

Connect the cut
Ryan then takes horizontal sections across the head and takes off the corner on the middle top of the mullet haircut. He's working with a travelling guide and point cutting along the way to create texture in the hair.

Cut the underneath of the mullet sections
Ryan then decides to cut the large section on the head. He parts away the hair in front of the ears, and gets down to business. He works on the back left portion of the cut in vertical sections. He angles his fingers so the knuckles are pulling away from the head, retaining length in the neck but still utilizing the guide line. He is over directing to the previous section as he travels cutting following the guide into the middle back.

Cut the Right back portion of the haircut.
The back corner on the right of the mullet will be cut with the same sectioning pattern, but a different angle. He is taking the hair cut shorter, the knuckles are tight in to the head. He's working parallel to the section following his guide, with no over direction. The length gets longer in the middle back because the guide is longer in the middle back. The look of the back should be a-symmetric.

Cutting the sides of a modern mullet
The sides at the front of the hair have been left because we are working with clippers here to cut it eventually. Ryan will later show you how to mini fade the front corners, but first he needs to just take away the length. So, gather the hair in one big section and snip away for now.

Create balance in the modern mullet
What's nice about Ryans vision, is he's created a balanced opposite effect of a symmetry in the top too. He goes back up top and cuts with an angle from short to long to give an edge to the look. The Short point of the top is on the left side, the side that has a longer back. But the long point in the front is on the right, offsetting that un-balanced look.

Grab a razor to cut the mullet
Ryan uses a TriRazor and shows you how you can play with it like a comb. Ryan wants to create little gaps of texture in the top of the hair, so he etches his 25% edge sporadically through the top, without using a comb. He the uses the 50% side and the same method in the back. The 50% side was chosen because it is a denser area of hair and needs a little more taking away. Ryan mentions if you wish, you could create this whole look with the 100% side – something I'd love to see.

The TriRazor is available on shopfse.com. Along with a cutting course that is valuable to both ladies and gents cutting called the Digital Haircutting System. This gives insight into technique, terminology 8 video haircut tutorials a digital book and certification – what's not to love?

Shape and style the mullet
Ryan uses barbers classic and the reformer by Paul Mitchell. He cocktails the two and works them through the mullet damp to style. He then initially works the blow dry directionally with his hands. He's blow-drying high speed low heat to minimize damage. He then smooths over with a vent brush. The sides flow back with the a-tail kicking out for a bit of flare. Then Ryan attaches the diffuser to create more texture up top.

Shaving the fade in a mullet
Ryan sections the hair in front of the ears and decides to taper it with clippers. He creates a guide at the bottom with his trimmers, and uses a foiler to take off the hair at the edges. He uses a brush to remove cut hair so he can clearly see his fade. Then he works the area above the trimmer section with an open blade on his clippers. He then closes the blade and works between the trimmer and open blade section. He gradually opens the blade working in an upwards motion to blend the two lengths. Then the same concept is used going into a 1 grade and a 2 open.

Blending that fade in a mullet
Use the open blade to blend the line between the transitions. So, it goes foiler > trimmer > 0.5 > 1 > 1.5 > 2 > 2.5. Ryan explains in the video that when hes fading hair, he looks for the shade. If areas look darker on the head, go in and blend them out. No head is perfectly flat and it will have dips and bumps. Get in there and work on them darker patches.

Detail the mullet
Once both sides are shaved, it's time to tweak and detail. Ryan cuts in some cool edges and angles and emphasized the angle on the recession point and the ''flare.'' He then goes in with some Paul Mitchell pump me up to expand them cool angles he's created in the look. We hope you all enjoy the end result.


LATEST VIDEOS

How To Cut Side Part Layers

Shag Pixie Haircut

The Side Part Bob: A Fresh Take for 2024

Learn The Tousled LOB (LONG BOB)

Short Shag Haircut Tutorial
